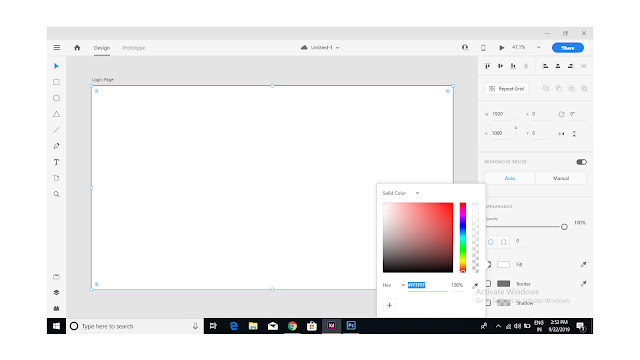
Step 1: Left side we have tool where you can find rectangle shape icon. Fill the whole artboard (1920px X 1080px).
Step 2: Now use color panel on right side as marked ("Appearance" Section)
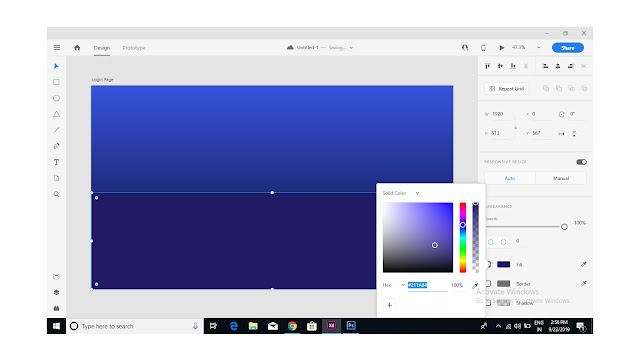
Step 3: Select the "Linear Gradient" and give color codes top "#3753DE" and bottom "#0A0824". (You need to select the small circle just below the "Linear gradient" title)
Step 4: Create a half rectangle and add solid or linear gradient. I used Linear graident. Top "#61BFB6" and Bottom Color "#6415BE". You can see the change below.
Step 5: Create a mountain like shape with pen tool and add linear color code top "#FE205C" and bottom "#29107F".
Step 6: Add "Object Blur" and Give opacity "32%" .
Step 6: I added a "Ellipse" (Shortcut E) on right side to give more effect. Linear color code top "#460CBC" and bottom "#F119A1". Add "Object Blur" 30 and Give opacity "17%" .
Step 7: I added one more "Ellipse" (Shortcut E) on top to give city light effect. Solid color code "#6EA0F8" ". Add "Object Blur" 45 and Give opacity "34%" .
Step 7: Here by using pen tool i created a building shapes and windows with white color. You can add yellow also. Give a little object blur to windows light (Object blur 7). Once u made all, select and group it. (Right click --> Group).
Step 8: "Ctrl+ C" to create a copy and paste it "Ctrl+V". Now u can see the flip icon on right side, click on "Flip Vertically".
Note : Select shape or object to get the settings on the right side.
Please subscribe, by clicking "SUBSCRIBE" button at the top.
More links:
========


