
Step 1: Create two artboards, in this example i took two iPhone X artboards (iPhone X - 1 and iPhone X - 2).

Step 2: Create 2 different objects in each artboard, like this in the image. One with 25% filled and one with 75% filled.
Step 3: Now, click on the artboard title i.e "iPhone X - 1" (which will turn lite blue when selected).
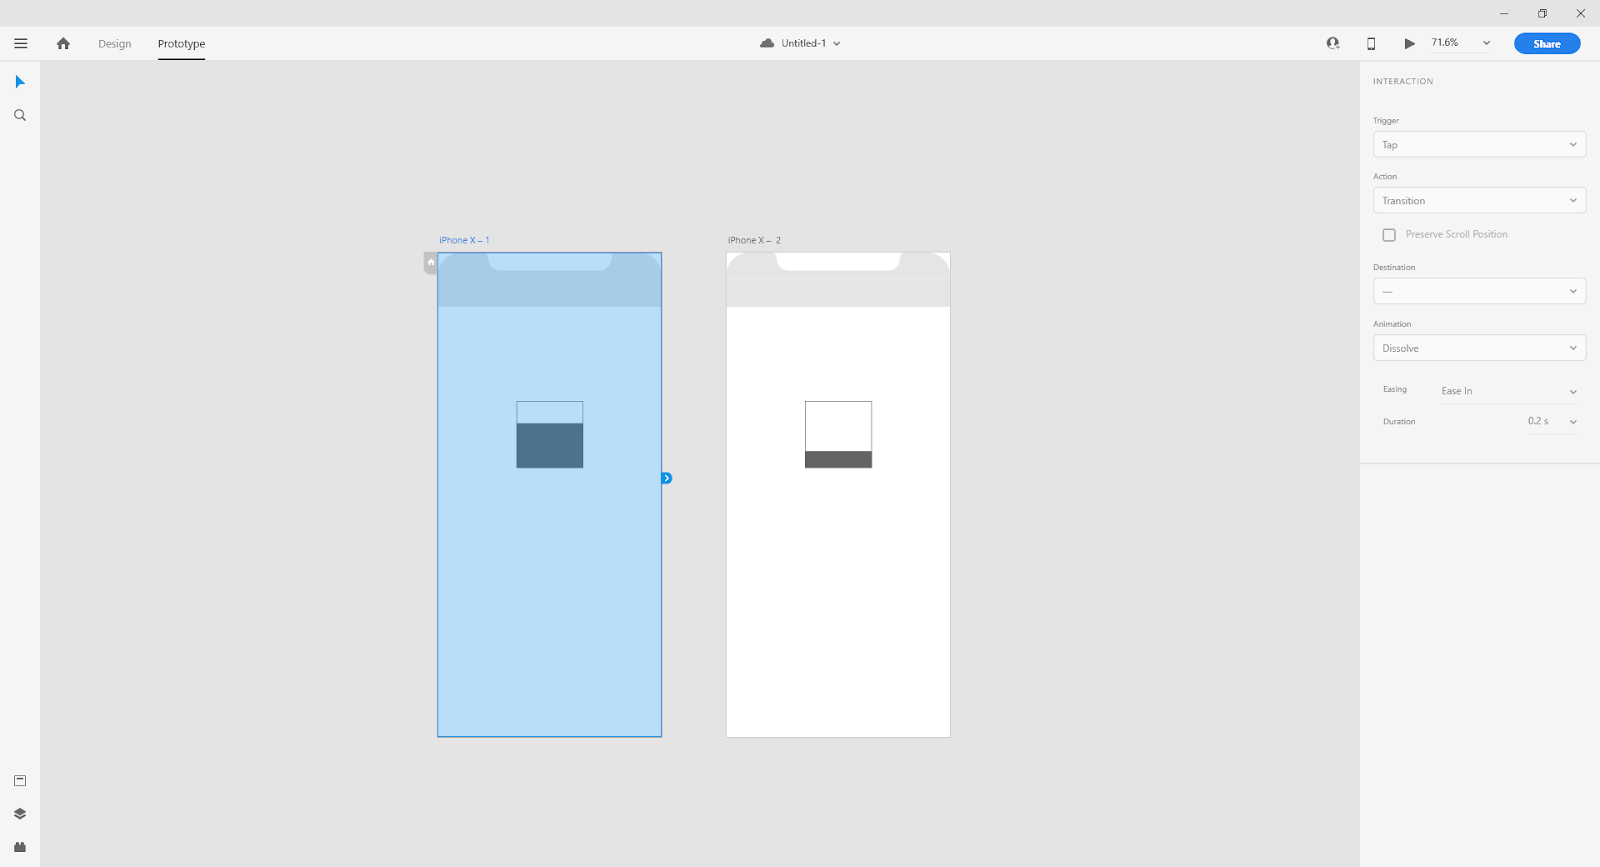
Step 4: Now, at top left corner you will see 2 titles "Design" and "Prototype", Click on "Prototype" (complete artboard will turn blue when selected).

Step 5: Click on small arrow icon and drag to other artboard "iPhone x - 2" and release. Now both will be connected.

Step 6: Now at right side you will see "Interaction" panel. Find "Trigger" section and select option "Time".
Trigger: Time
Delay: 1 s
Action: Auto-Animate
Destination: iPhone X - 2
Easing: Ease Out
Duration: 0.2 s
(You can play with these parameters)

Step 7: Repeat step 3 to step 6 for "iPhone X - 2" as well, click on the artboard title i.e "iPhone X - 2" and drag arrow to "iPhone X - 1".

Step 8: When both artboards are connected as in image. You can click on "play" icon on top right corner.
Please subscribe, by clicking "SUBSCRIBE" button at the top.
More links:
========
Graphic Resources
